
The Many Features of the Appointment Check-In Window
To provide your front office with as much information as possible, the MedSoft Check-In window allows you access to many features in one window.
Appointment tab
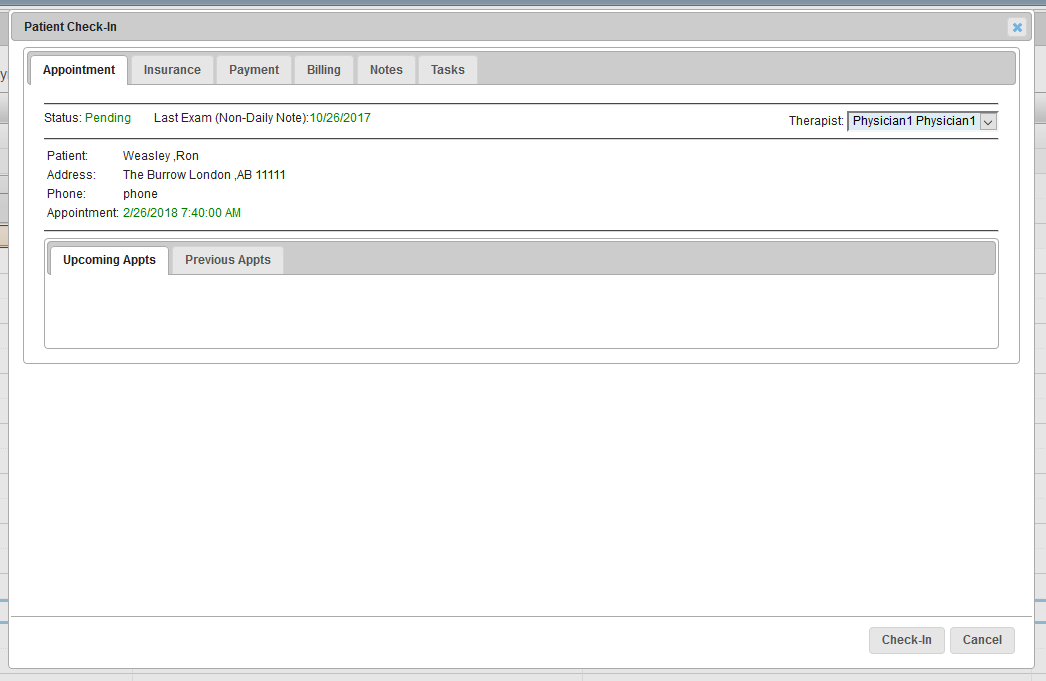
The “Appointment” tab shows Patient name, address, phone number, and appointment time, as well as any upcoming and previous appointments.
Additionally, this tab shows you the Therapist that the patient is assigned to work with. This therapist is set at Registration, and can be modified in the Patient Center detail screen as needed. This additional drop-down at the check-in window allows your front office to modify the Therapist for a single appointment as needed.
Insurance tab
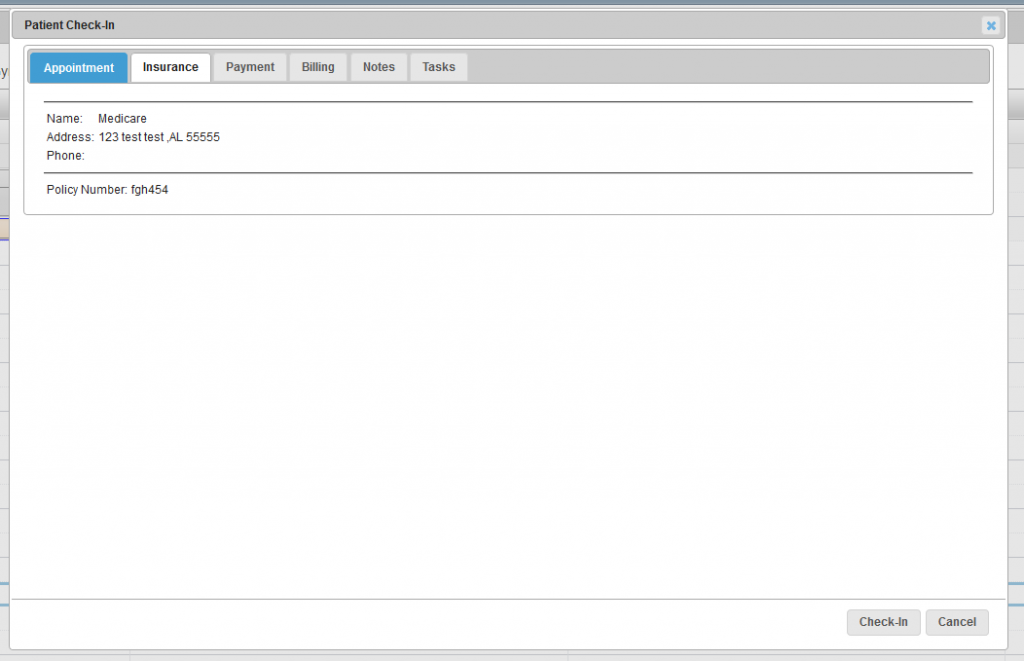
The “Insurance” tab displays current Insurance and Policy information.
Payment tab
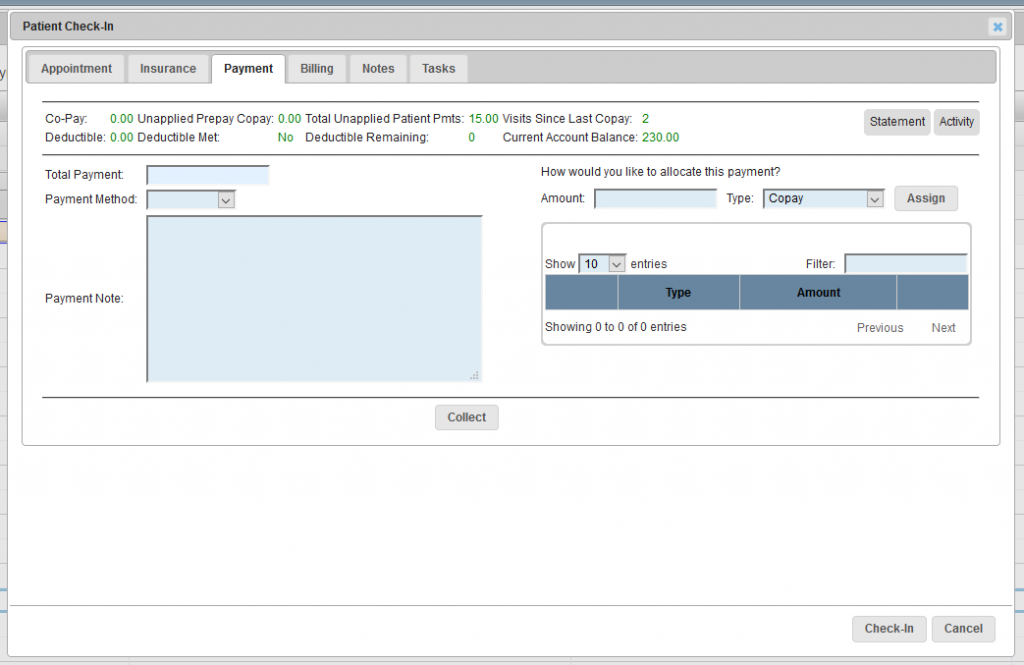
The “Payment” tab pulls over many details from both the patient’s policy and the patient’s financial history. This screen displays details about the Co-Pay, Deductible, and Current Account Balance.
Patient Payments can be collected from this screen by entering in the payment amount, payment method, and a payment note (of up to 1000 characters). The grid on the right should be filled out to allocate the payment appropriately. Once the “Collect” button is clicked, a receipt will be automatically generated. Please wait for receipt to load before proceeding to next step.

Billing tab
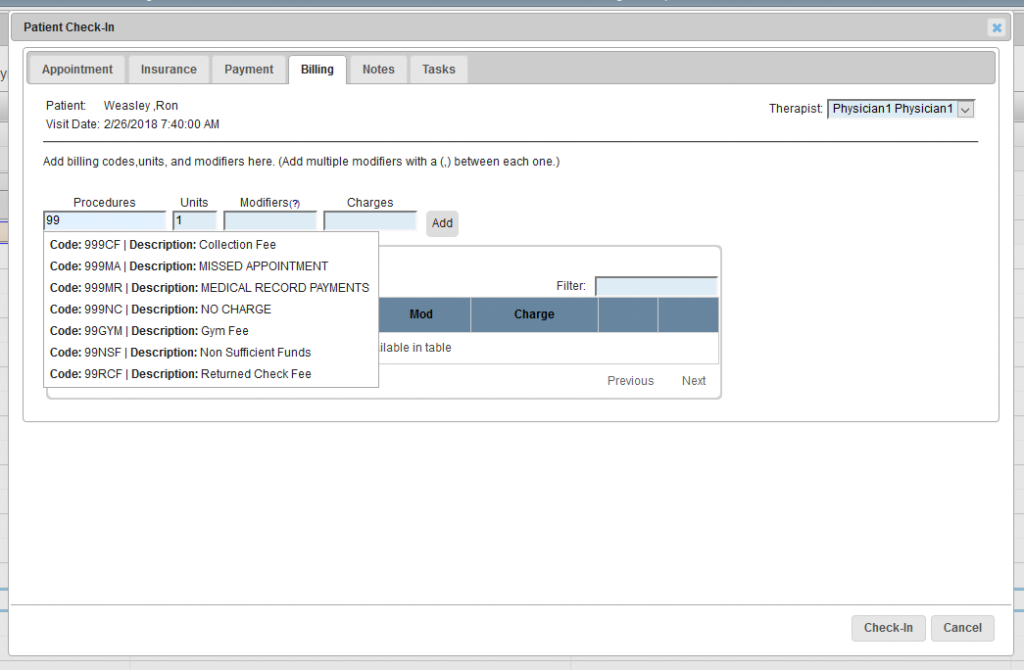
If any supplies were purchased at check-in, those billing codes can be added directly through this tab. This tab should not be used for Eval and Treatment billing codes, as those are added directly through PT Exam Documentation. Adding Eval or Treatment codes on this screen will result in duplicate billing errors.
Notes tab
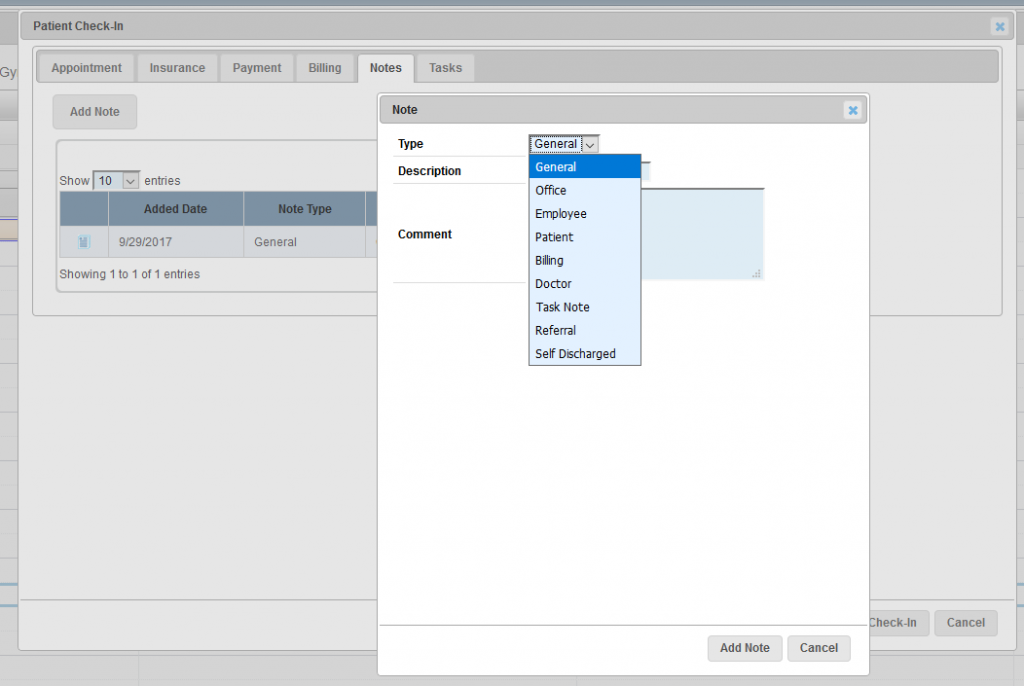
Any Notes on the patient’s file will share directly to this tab, so users are able to see pertinent information at check-in. Additionally, users can enter new notes directly from this screen without the need to navigate to the Patient Center.
Tasks tab
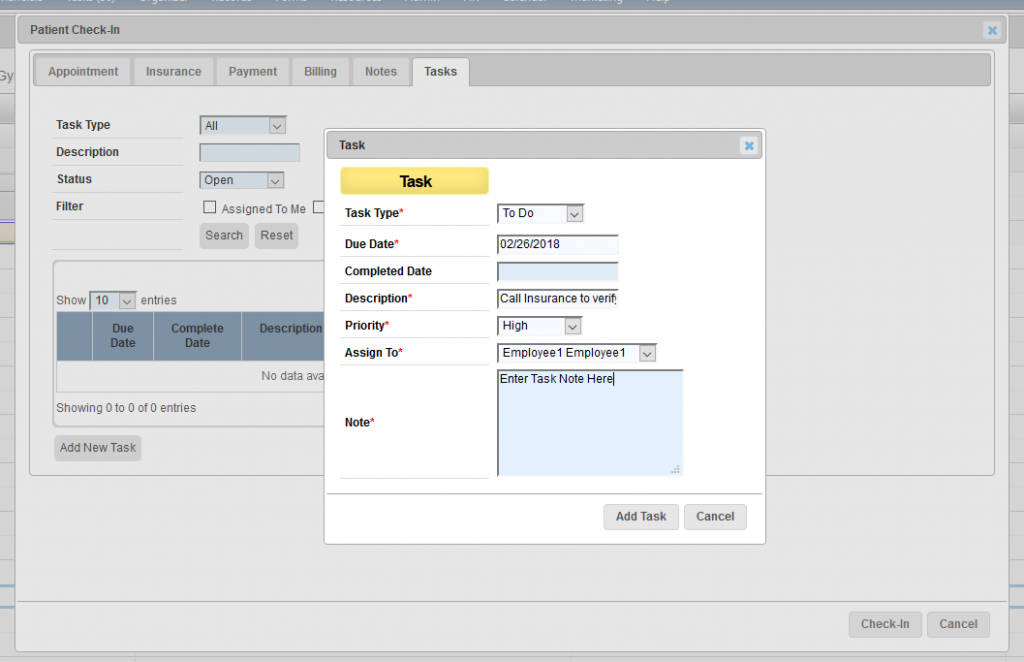
Any pending tasks on the patient’s file will share directly to this tab, so users are able to see pertinent information at check-in. Additionally, users can enter new tasks (for themselves or other users) directly from this screen without the need to navigate to the Patient Center or Task screen.
At any point in this process, or after any necessary payment has been collected, the Patient can be checked in by clicking the “Check-In” button at the bottom of the window.
“Checked-In” status will now show on the calendar for this patient.