The “Quick Search” box on MedSoft’s Appointment Calendar allows users to quickly locate one patient, view upcoming and previous appointments, and generate appointment PDFs.

The Quick Search box is found at the top right of the Appointment Calendar. Search for any patient by Last Name, then select the appropriate patient from the Find-As-You-Type search results.
Note: to limit the number of results, patients in Closed, Discharged, and Self-Discharged statuses do not show up in the search results.
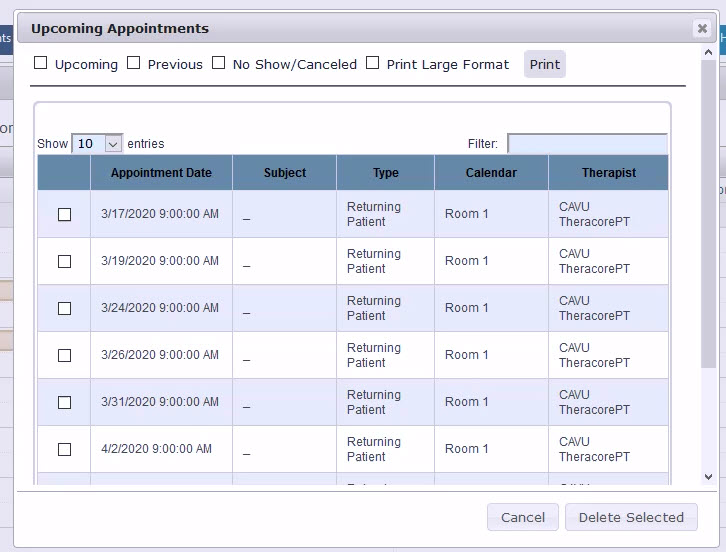
After selecting the patient, a pop-up window will show all Upcoming Appointments for the patient.
From this window, Front Office users can view Upcoming Appointments, generate Appointment PDFs, and Delete Selected Appointments.
Generating Appointment PDFs
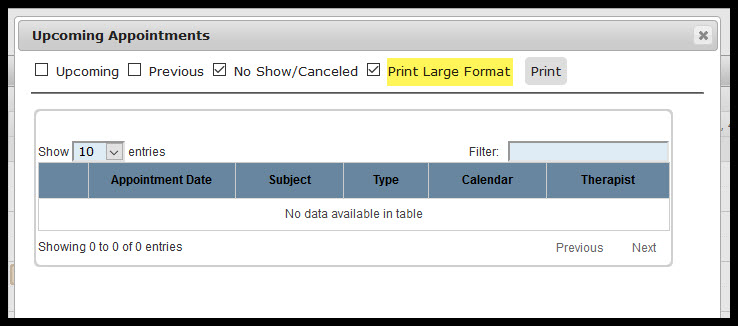
To generate Appointment PDFs, use the checkboxes at the top of the window. Users can choose to print Upcoming Appointments, Previous Appointment, and/or No Show/Canceled appointments by selecting or deselecting the appropriate checkboxes.
By checking the “Print Large Format” box, the PDF will generate with a larger font size. This is especially helpful for patients who may have vision limitations and would like a printout of upcoming appointments.
Click the Print button to generate the PDF. The PDF will load in a new window.
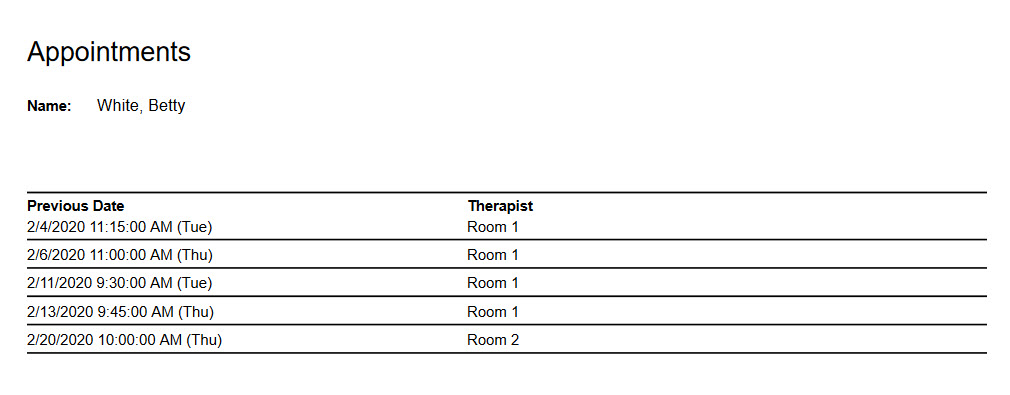
Appointments PDF – Regular Print Size 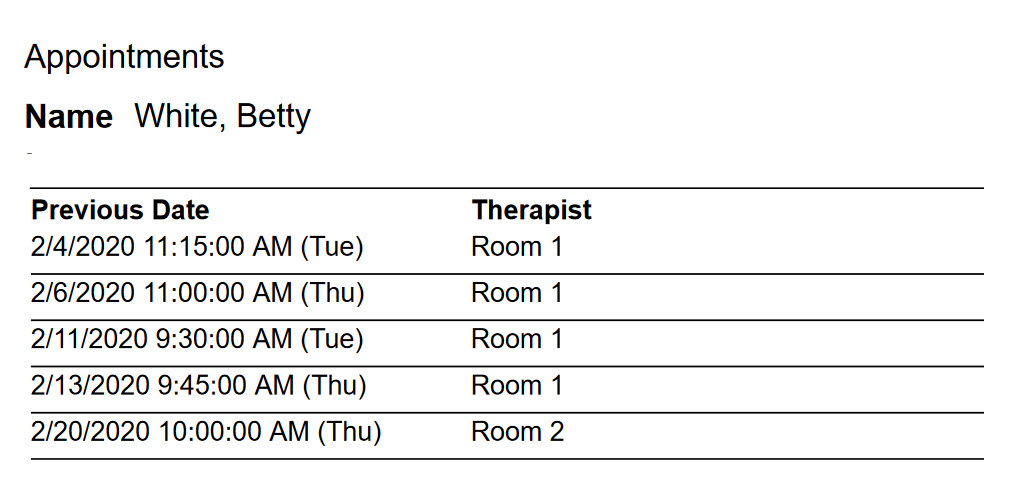
Appointments PDF – Large Print Size
Deleting Selected Appointments
While all appointments can be deleted directly from the Appointment Calendar, it is sometimes faster to pull the patient up via the Quick Search menu, then delete specific appointments directly from the Upcoming Appointments window.
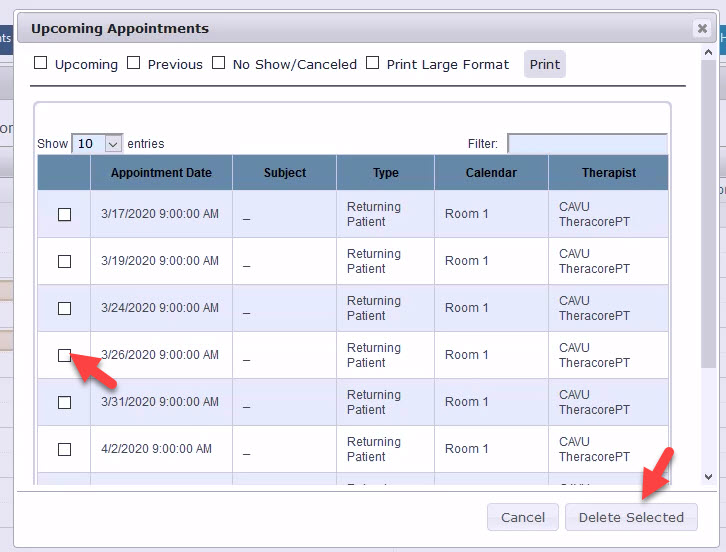
To Delete Selected appointments, check the box next to the date of the desired appointment(s). Then click “Delete Selected.” This will delete any appointments that have had the checkbox selected.